Implant Removal Kit – Gen2
$1,750.00
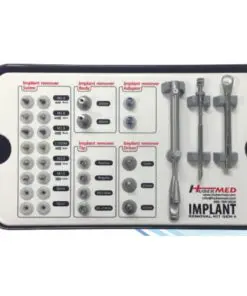
Effectively and easily remove failed implants with our next generation implant removal kit incorporating patent-pending wave technology to enhance the popular Neobiotech, Biomet 3i, and Zimmer 3i Implant Removal Kits. 1 No need to trephine! Features new implant removal instruments that reduce rotational slippage to allow for greater control during the implant removal procedure.
Step-by-Step How to Use

1. Expose the implant to be removed.
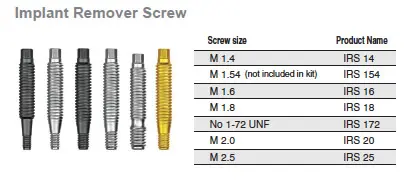
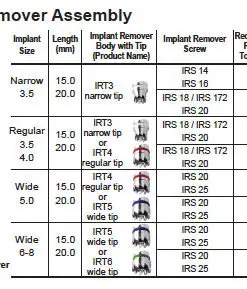
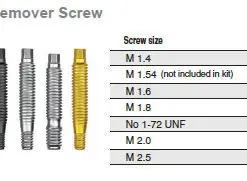
2. Select a Implant Remover Screw that corresponds to the specific implant (see “Compatibility List” in this pamphlet) and thread it into the implant clockwise using the Hexed Screw Driver (Fig. 1).
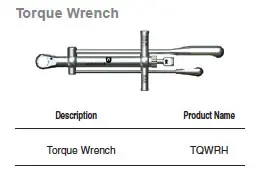
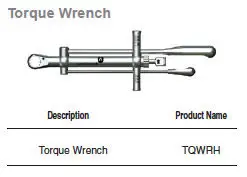
3. Using the Hexed Screw Driver (Fig. 2) and Torque Wrench (Fig. 3), tighten the Implant Remover Screw in a clockwise direction to 50-60Ncm by pulling on the THIN TORSION BAR to the recommended torque.
Caution: Failure to tighten the Implant Remover Screw to 50-60Ncm will damage the screw and cause loosening during implant removal.
NOTE: All components that are used intra-orally must be secured to prevent aspiration or swallowing.
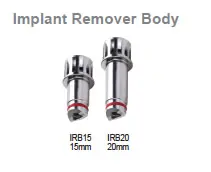
4. With the Implant Remover Screw in place (Fig. 4), manually thread the Implant Remover Assembly (Fig. 5) onto the Implant Remover Screw in a counterclockwise direction.
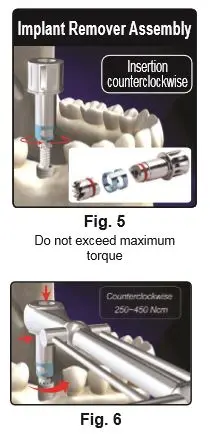
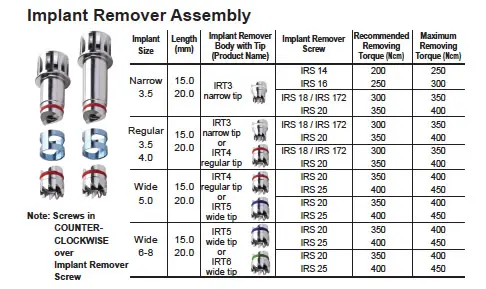
5. Using the Torque Wrench (Fig. 6), rotate the Implant Remover Assembly counterclockwise until the implant rotates by pulling on the THICK TORSION BAR to the recommended torque. Caution: Do not exceed maximum torque. Use irrigation during the implant removal process. (We don’t recommend to exceed over than 300Ncm, as this may break the fixture or Jaw damage may occur).
Note: With opposite hand apply finger pressure to the top of the Hexed screw driver or hold body of implant remover to prevent unscrewing of the assembly while applying torque
6. If the implant does not turn at maximum torque, remove the Implant Remover Assembly and relieve a minimum amount of coronal bone around the implant using a Round Bur. Repeat step 5.
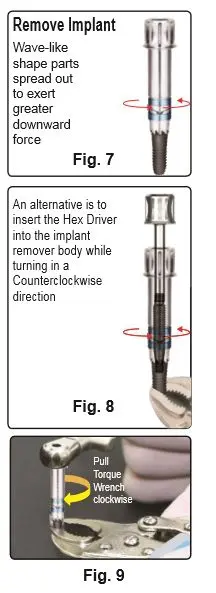
7. After removing the implant (Fig 7) with the Implant Remover in place, grip the implant firmly in a vise, (Fig. 9) and rotate the Implant Remover in a clockwise direction using the torque wrench. Keep the Implant Remover Assembly.
8. Should the Implant Remover not turn in a clockwise direction (Fig. 8) an alternative is to insert the Hex Driver into the implant remover body while turning in a Counterclockwise direction to allow the screw to loosen (applying the Torque wrench may be necessary) while holding the implant in a Vise. Note: Separate the Implant Remover Assembly by pulling on the tip to expose the individual components.
9. Discard the implant and the attached disposable Implant Remover Screw.
Next Generation Implant Removal Kit
The next generation implant removal kit was designed to improve upon the popular Neobiotech, Biomet 3i, and Zimmer 3i fixture removal kits. Based on the proven counter-torque and reverse screw technique (Froum S., Compendium. 2011;32(7):2-24), this kit too uses the power of counter-clockwise force to safely explant failed implants. Moreover, it now features a new patent-pending Wave Technology. Two wave-like shape parts spread out, to exert greater downward force.
Implant Removal Kit: Gen2
Purchase now & get 6 Specialized Implant Remover Screws
$1750
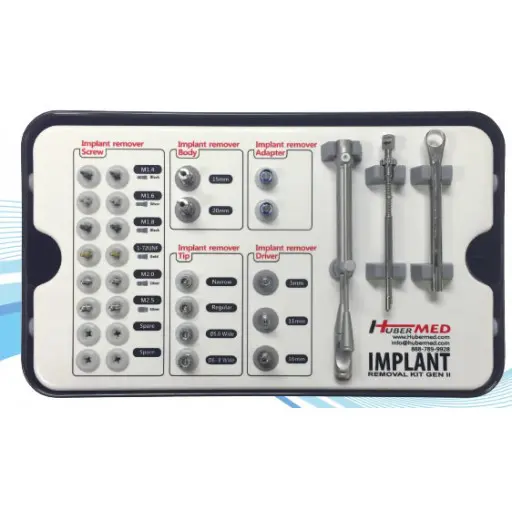
Includes:
- 6 Specialized Implant Remover Screws (+2 of each type) for all popular implant systems.
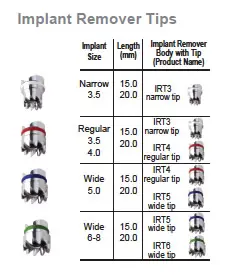
- 4 Gen2 Implant Remover Tips for different implant sizes, 2 Adaptors and 2 Bodies.
- 1 Special Torque ratchet with two directions for proceeding fixture removal.
- 3 Hex Screw Drivers
Key Benefits of the Next Generation Implant Removal Kit
- No more need to trephine!
- Works with almost implant systems! The Neo Fixture Remover Kit, from NeoBiotech, works with almost all implant systems to effectively remove failed implants.
- Reduces need to use trephine drills
- The new and improved design reduces rotational slippage to allow for greater control during the implant removal procedure.
- 2 wave-like shape parts allows for faster, and more consistent separation of components after the implant is removed
- Effective instrumentation for atraumatic removal of implants
- Eliminates the use of trephine drills and thereby minimizes bone trauma
- Compatible with most implant systems
View the Fixture Removal Kit in Action
Note: After about 30 seconds, this video shows an actual case using the kit.
How to Use the Implant Removal Kit
| Weight | 0.2 kg |
|---|---|
| Dimensions | 8 × 8 × 8 cm |
Be the first to review “Implant Removal Kit – Gen2”
You must be logged in to post a review.




Reviews
There are no reviews yet.